Difference between revisions of "Modeling Actions"
Jump to navigation
Jump to search
| Line 12: | Line 12: | ||
# Name the component (or hit return; you can rename it later). | # Name the component (or hit return; you can rename it later). | ||
<br clear="all"> | <br clear="all"> | ||
=Connect Flow to Stock= | |||
[[File:flowConnect.gif|Inserting a component]] | |||
# Drag the cloud from the Flow connector over the Stock. | |||
# You can delete the connection using the Flow property pane. | |||
Revision as of 17:17, 30 January 2018
This section summarizes all of the commands and gestures used to build a model in the Design Frame.
Creating and Naming a New Project
- Click File | New in the Menu. This will create a new project with an untitled main capsule
- Enter the Capsule's name in the 'Model Name' text area.
- Save the project using File | Save As
Add a Component, Display or Control
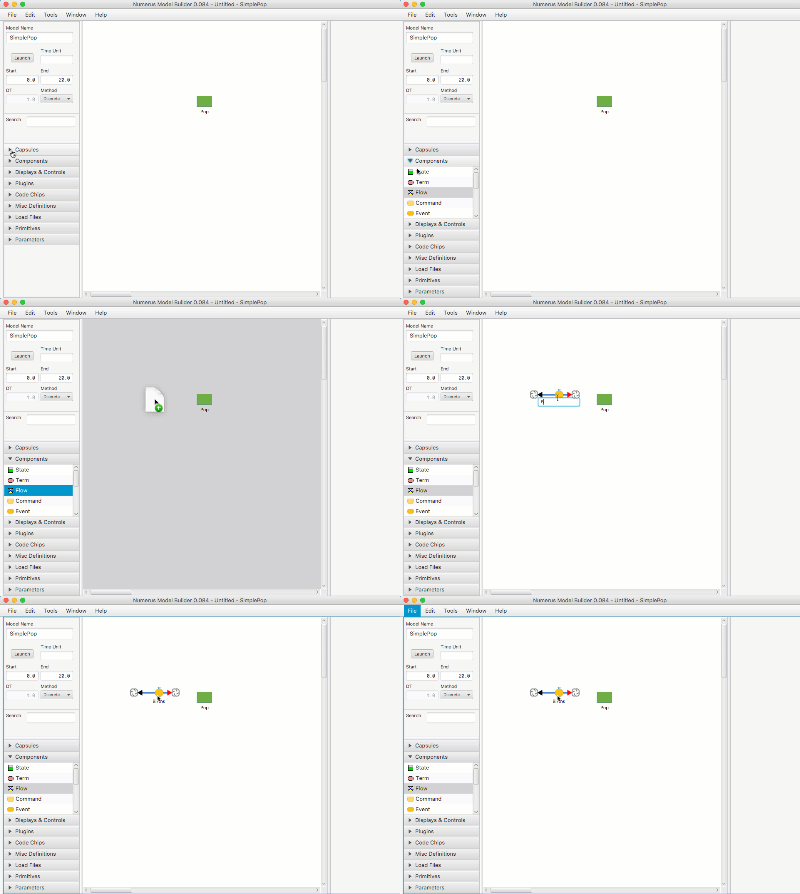
- Open the Components (or Displays & Controls) design tab.
- Select the component by pressing on the mouse.
- Drag the component to the Model Canvas.
- Name the component (or hit return; you can rename it later).
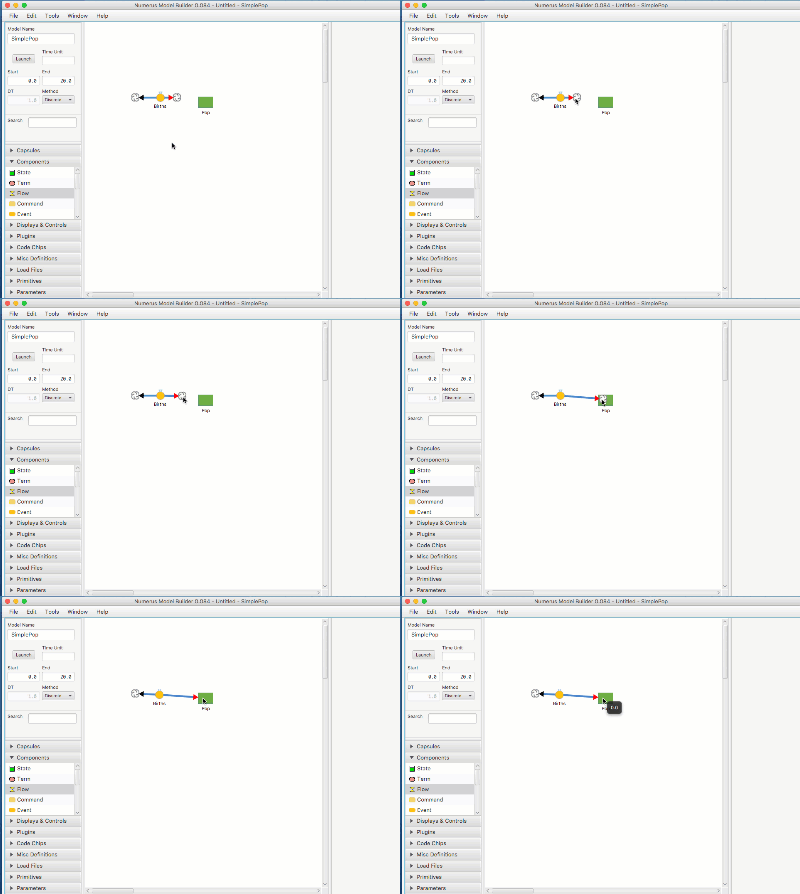
Connect Flow to Stock
- Drag the cloud from the Flow connector over the Stock.
- You can delete the connection using the Flow property pane.

